
TECHNOTES
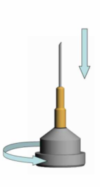
Preparing Loops with Reusable Bases
Quickly assemble loops into caps for crystal harvesting, without using glue or waiting for epoxy to dry.
Eliminate time spent glueing loops into bases.
Designs available for every all automated beamline sample placement robots
The bases grip the loops securely at both cryogenic and room temperture
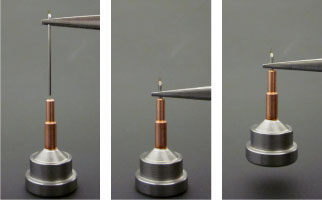
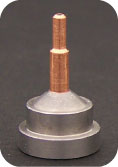
You no longer need to spend time gluing crystal mount/loop pins into your goniometer bases (“caps”) before harvesting your crystals. Gluing and removing glue can be time consuming and messy. Once glued, the loop and base must be used as a single unit. If the loop fails or becomes bent, both loop and base become unusable. If the glue fails during automated handling, the loop and pin can fall out and jam the automounter.
The easiest crystal harvesting and the best diffraction outcomes are achieved by matching the mount’s aperture size and shape to the crystal. But if that perfect mount isn’t already glued into a base, you’ll likely just grab whatever is at hand — and suffer the consequences. Mitegen’s Reusable Goniometer Bases elegantly solve all of these problems. They grip the stainless steel rods of your crystal mounts/loops without epoxy, glue or grease. As a result, you can:
- Insert mounts in the bases and then immediately begin harvesting crystals and collecting data.
- Quickly replace damaged mounts, without disposing of the base.
- Survey your plates for crystals, and then quickly assemble bases with mount aperture sizes and shapes to match the harvesting and data collection challenges they present.
Base Styles Available:
B1 (SSRL)
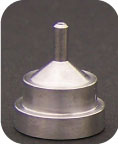
B1A (ALS)
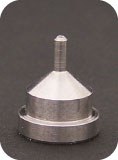
B3 (SSRL)
B3S (ALS)
B5 (SPINE)
REUSABLE BASE INSTRUCTIONS FOR USE AND CARE
For optimum performance and maximum usable life of your reusable bases, we recommend the following procedures:
- Make sure the bases are at room temperature before attempting to insert or remove sample mounts. Attempting to insert or remove sample mounts immediately after removal from cryogenic storage can damage the gripping equipment.
- Make sure that all parts are clean and dry, and do not use lubricants. Moisture, oils or lubricants will decrease the gripping strength.
- Grip the crystal mount’s stainless steel rod firmly using heavy-duty serrated-end tweezers, such as those sold by Mitegen. These minimize rod slip and twisting during insertion and removal.
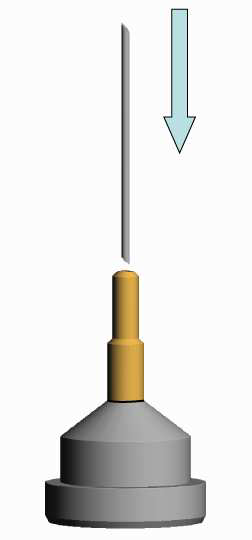
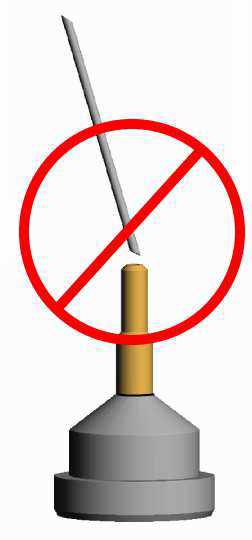
- Insert the stainless steel rod straight down into the center of the post. Avoid tilting the rod to the side or inserting at an angle.
- As you insert the rod, rotate the base slowly to help guide the rod into the base and to ensure a strong, uniform hold.
- The rod should insert smoothly without excessive force. If insertion is difficult or the grip is not secure, remove the pin and repeat steps 1-3. Do not force the steel rod into the base.
- Although these bases are reusable, the will eventually wear out, and may be damaged by improper use. If you cannot obtain a secure grip, either dispose of the base or use epoxy or glue (as with a conventional base.) Do not send loosely held samples to the synchrotron.
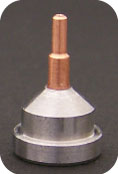
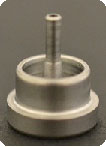
Technical Specifications for Goniometer Bases B1, B1A, B3, B3S, B4, and B5
| Bases | ||
| Materials | 416 magnetic stainless steel (B1, B1A, B5), copper (B3, B3S) and brass (B4) | |
| Base diameter at bottom | B1, B1A, B3, B3S, B5: inside: 9.70 mm; outside: 11.95 mm; B4: 3 mm | |
| Dimensions of tubing capture region | diameter: 1.93 mm, length: 5 mm (4 mm for B4). | |
| Central hole diameter | 0.81 mm | |
| Central hole bottom - height above goniometer head | B1,B3: 0.043" (1.1 mm) | |
| Height of MicroMount aperture above goniometer head magnet | B1: 21 mm for 19 mm pins; B3: 21 mm for 19 mm pins; 19.7 mm for SPINE length pins (as specified in SPINE standard) | |